
Are you looking for ways to improve your Facebook business page management and make your social media marketing more efficient? Learning how to set up Meta Business Suite is a key part of taking your Facebook advertising to the next level.
Here’s what you’ll be learning from this article:
- What is Meta Business Suite
- How to access Meta Business Suite
- How to create a post using Meta Business Suite
- Additional features of the Meta Business Suite
- Home
- Notifications
- Post & Stories
- Ads
- Insights
What is Meta Business Suite?
Meta Business Suite is a free tool that lets you manage your Facebook and Instagram accounts (including ads) from a single, simple dashboard. This is Meta’s tool for “managing ad accounts, Pages, and the people who work on them — all in one place.”
You can manage all accounts on your own or elect and give the admin role to others on your team, to manage the platform using various tools. This is intended to make managing your company’s social media presence much easier.
One of the most recent additions to the platform, it is designed to reduce the time-consuming flaws in managing social media while simplifying the process for businesses to maintain their Instagram and Meta profiles.
How to Access the Meta Business Suite?
Step 1: Search for Business.Facebook.com (which takes you to the Meta Business Suite), or click on Meta Business Suite under your profile to bring you there.

Step 2: Select your business account to connect in order to manage Facebook, Instagram and Messenger.
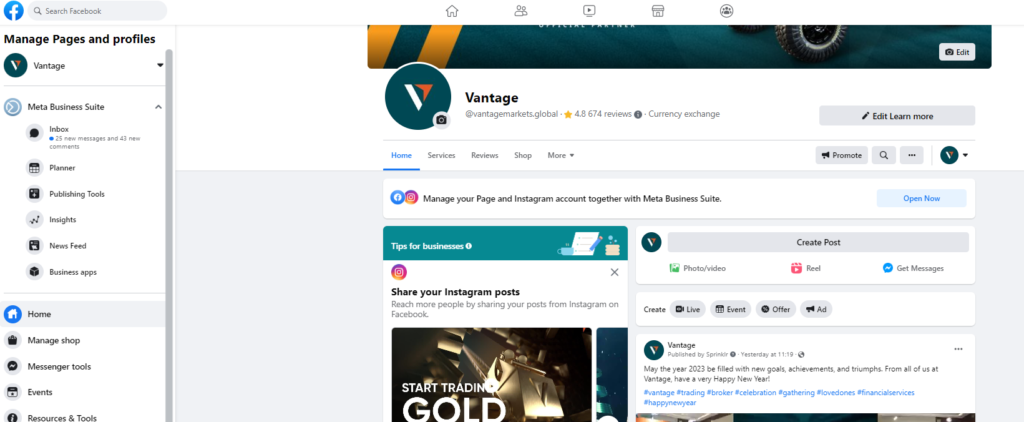
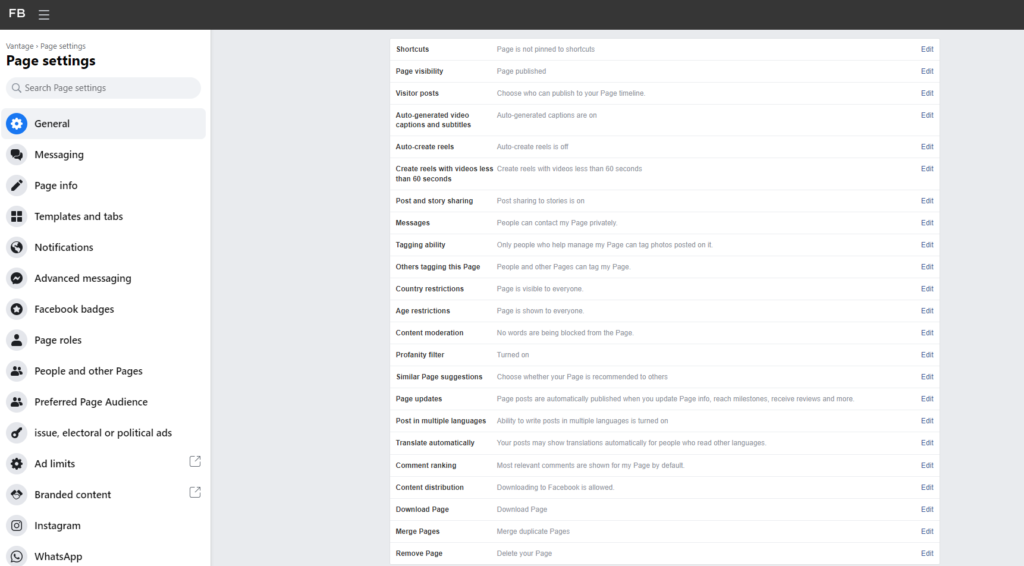
Do take note that in order to access both accounts through the Meta Business suite, your Facebook and Instagram accounts must be linked. You can link both accounts in your Facebook Business page interface by clicking Settings on the left menu bar.
Pro tip: You can download the Meta Business Suite on the App Store or Play Store to manage your Facebook Business Page via your mobile device.
How to Use Meta Business Suite to Create a Post (Facebook)

Firstly, you will have the option to choose between posting on Facebook, Instagram or both.
Creating a post is fairly straightforward. All you have to do is include a caption (the better the copy, the better the likelihood for engagement), add a relevant image if you wish to, and hit “Post”.
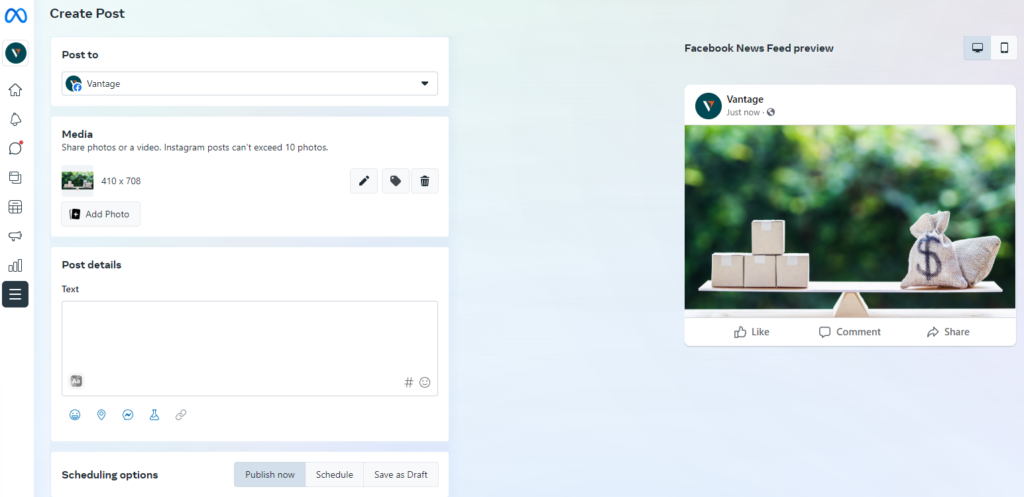
Under the “Post details” section, you can include the text and link what you want your viewers to see. You also have the option to customise your post for both Facebook and Instagram.
Remember to avoid pixelated or distorted images by ensuring that you have the correct pixel-size images. Here are the recommended sizes for images as posts:
- 1080 x 1080 pixels for Facebook and Instagram news feed and right-hand column ads
- 1080 x 1920 pixels for Facebook and Instagram stories
Here’s what a draft of your post could look like. Based on the preview shown, you can still edit and make changes to your post.
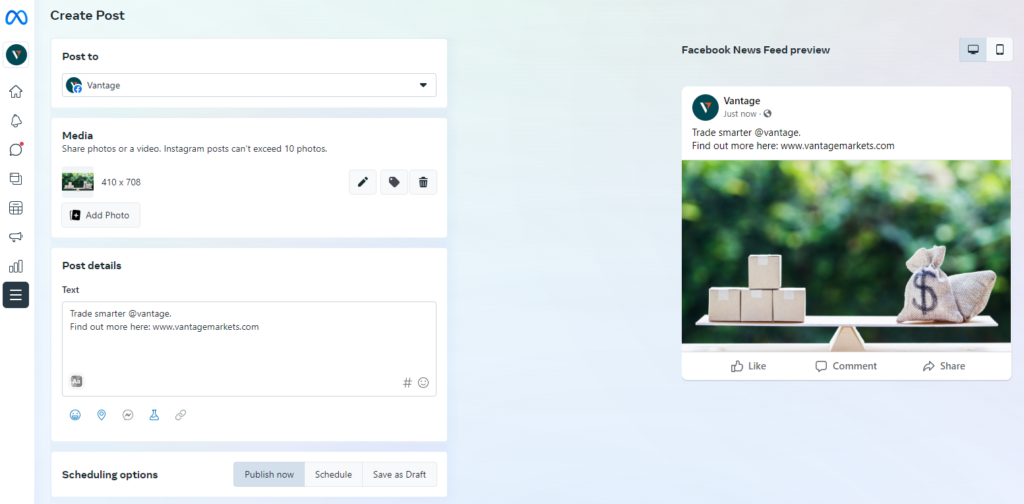
While you are able to post on either Facebook or Instagram, there is a minor difference between the two platforms that you’ll have to take note of.
Unlike Facebook captions, users cannot click on links in Instagram captions. Therefore, adding a clickable link in your Instagram profile bio is recommended, which you can use tools such as Linktree or Link in Profile for that purpose.
Don’t forget to preview what your post will look like both on Instagram and Facebook before publishing or scheduling your post. This is an important step in order to avoid mistakes and ensure that you perfect the post before having it shown to your audience.
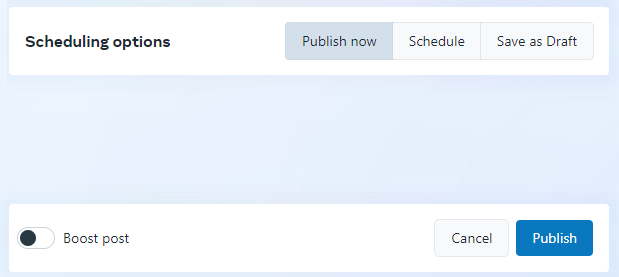
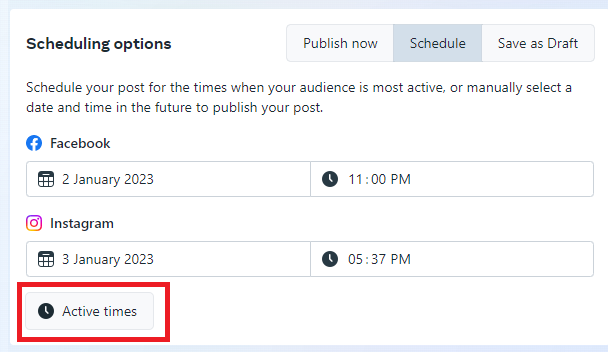
There are also options for you to publish, schedule or save your posts as drafts. You can also schedule different times for your posts on Instagram and Facebook respectively.
The “Active times” feature allows you to schedule your post for times when your audience is the most active. Alternatively, you can manually select a future date and time to publish your post.
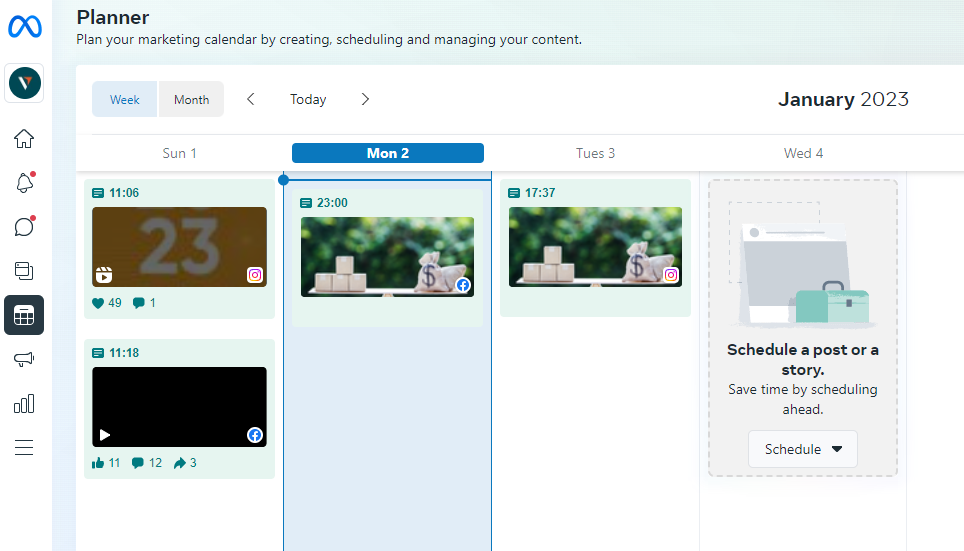
Click “Schedule Post” to bring you to the planner (picture shown below) where you can access both your scheduled and published post calendar.
Additional Features of the Meta Business Suite
- Home
The Home feature allows you to easily and quickly access your messages, comments and tasks.
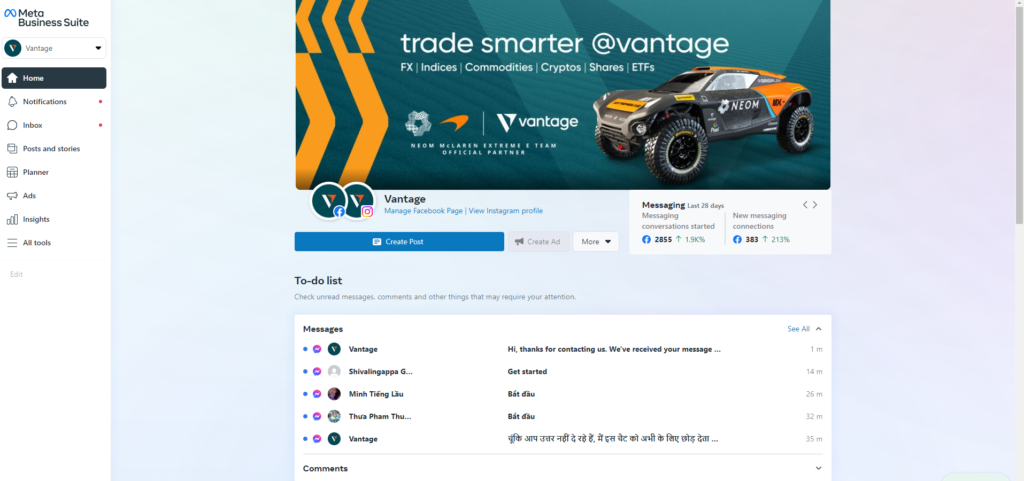
When you scroll down, you’ll be able to view all your recent posts and their individual performance.
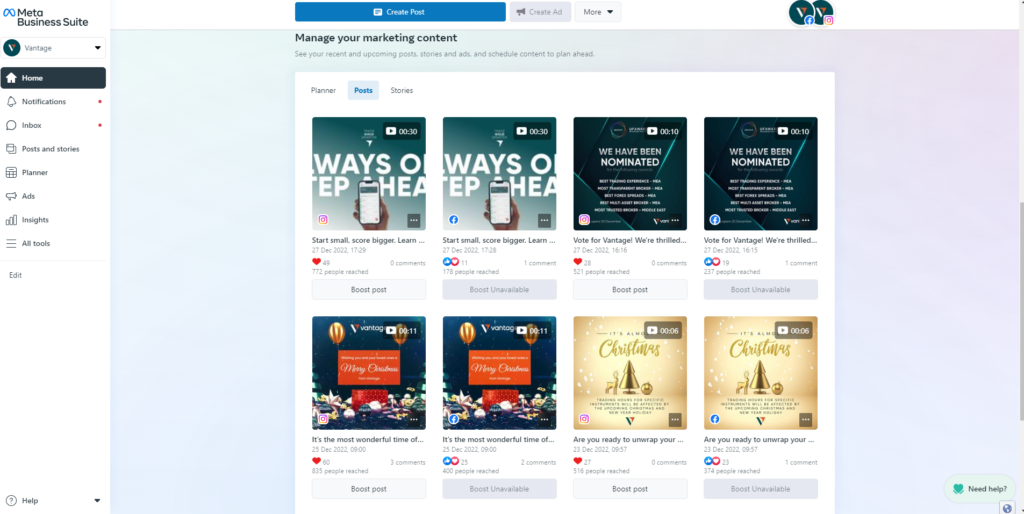
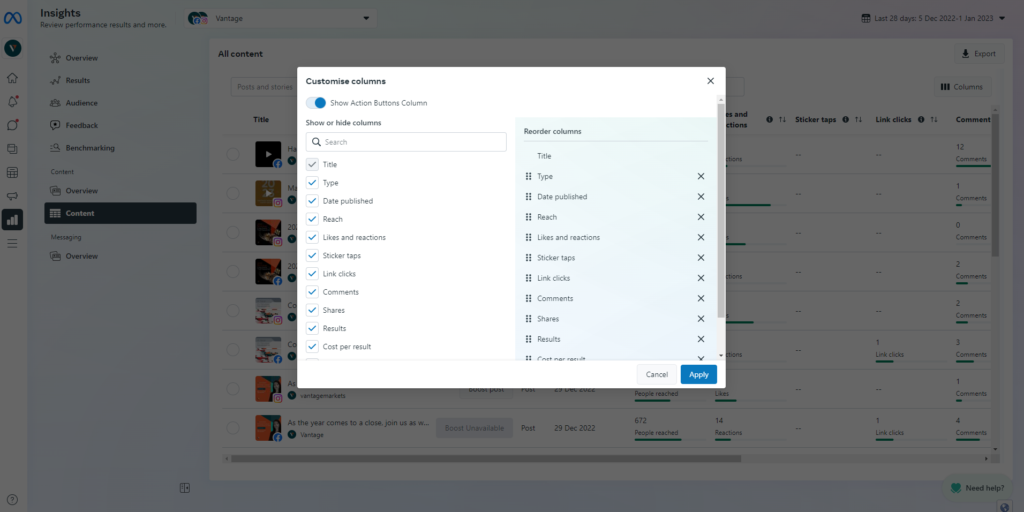
It also allows you to see all the posts and filter out the columns you want to see. For example, you could view by columns such as the Reach, Engagements, Shares and more.
It also shows you a consolidated overview of all your recent stories published.

- Notifications
Notifications ensure that you are kept informed on the latest activity to your company’s social media page. Meta Suite allows you to view notifications from Messenger, Facebook page and Instagram Business Account.

- Inbox
Whether you’re online or offline, the Inbox feature can make communicating with people interested in your company easier. It can also save time by allowing you to manage your company’s communications across Facebook, Messenger, and Instagram messaging all in one place.
Here are some things Meta Business Suite allows you to do:
- Read and reply to messages
- Read and respond to comments
- Organise inbox
- Filter conversations
- Set up automated responses
- Set a status
- Search messages and comments
- Manage customer information
On the right side, you will also be able to see specific information about profiles that have reached out to you. You can also label them (labels can be personalised) to identify their profile, making it easier for you to identify and manage current followers or potential followers.
- Post and Stories
This section allows you to manage all your posts and stories, while also serving as an alternative page for you to create stories, reels and posts.
When you publish a status update to Facebook, it will appear on your Facebook for 24 hours.
- Ads
Ads allow you to boost your posts, to reach a wider audience -, particularly a crowd that doesn’t follow your page. This is a useful tool for beginners who don’t have experience running ads.
Here’s how you can use the ads tool to boost existing posts:
- You can access this feature on the left sidebar when you click Ads. Select Create ad in the top right or click the Promote button at the top of your homepage.
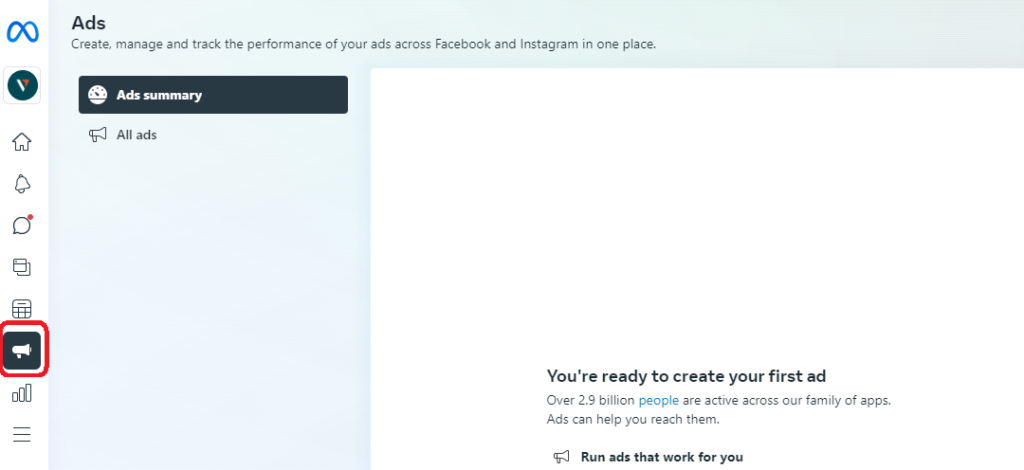
- Insights
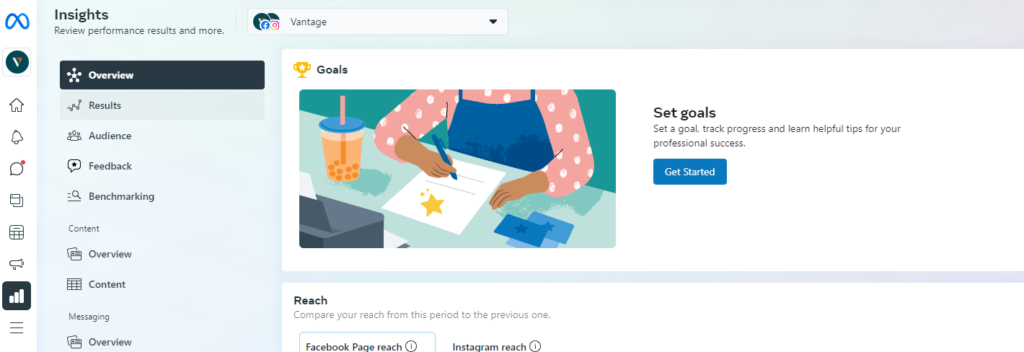
Insights help you understand the outcomes of your organic and paid social media efforts across Facebook and Instagram, all in one place.
Insights displays metrics, trends, and visual reports that can assist you in determining which Facebook Page and Instagram strategies work well and where improvements can be made. It can also provide you with handy information on your audience profile, trends, location and more. This can help you to optimise how you choose to spend your resources and fine-tune your social media strategies.
You can also choose to view this feature as a user instead of an admin. Here’s how to do it:
Step 1: Open the Facebook Page, click on your profile
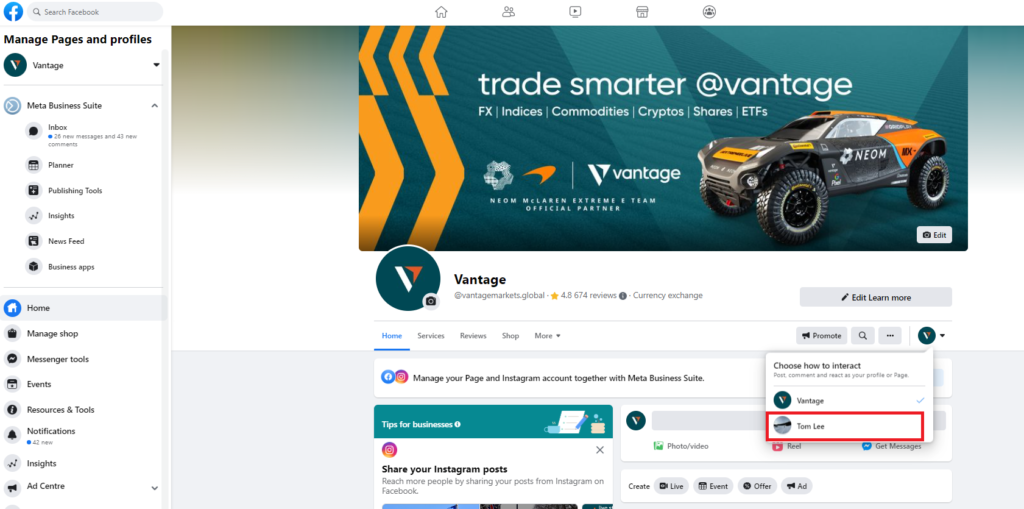
Step 2: Click view as your personal profile
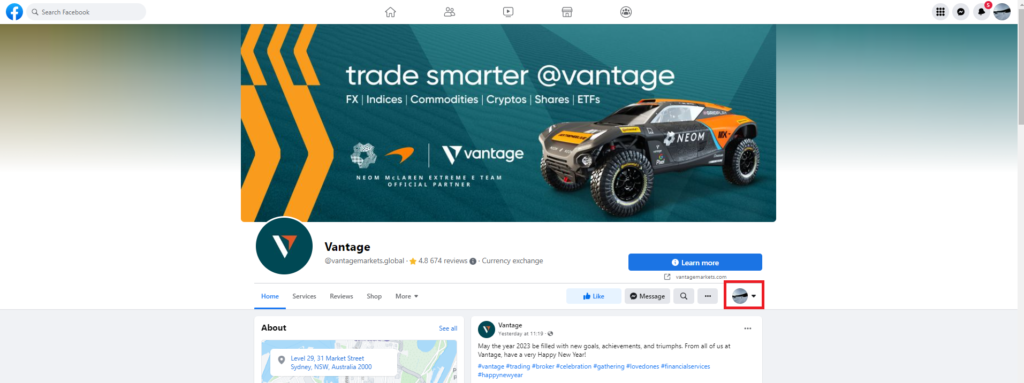
Step 3: Now you can view your Facebook page as a visitor. To go back to viewing the page as a Business account, press exit view.
Conclusion
There you have it — a quick run-through on how to get started with Meta Business Suite. Follow the Vantage Partners LinkedIn page and other social media channels for more marketing tips and tricks, or browse our blog for more educational materials to grow your affiliate revenue.

Disclaimer
Any information provided by Vantage to Introducing Brokers and CPA Partners is for general informational purposes only. Vantage does not guarantee the accuracy, completeness, or timeliness of the material and assumes no liability for errors or omissions. Reliance on this information is at the recipient's own risk.
This material is not financial or investment advice and should not be considered a recommendation or endorsement of any product or strategy. Introducing Brokers and CPA Partners must comply with all regulations when referring clients and must not misrepresent Vantage's services.
Vantage makes no guarantees regarding financial instruments' performance. Clients referred are responsible for their own decisions and should seek professional advice. Client acceptance is subject to applicable laws and regulations.
